Skip to content

DIY Alberta Ferretti Party Shoes

When I spotted the beautiful heels at Alberta Ferretti’s spring 2014 runway show my heart skipped a beat!

Not only are they seriously perfect for holiday parties, but they are soooo easy to DIY!

I found these black heels in the wardrobe room at work, and spent about $5 on satin ribbon. Easy.

Tools needed:

a pair of black heels  /  approx 3 meters of black satin ribbon  / scissors  / glue

Step one – Cut the ribbon in half.

Step 2 – In the exact middle of each piece dab some hot glue / super glue.

Step 3 – Quickly attach the glued section to the base of the heel. Hold for a few seconds to let the glue dry.

Step 4 – Put your shoe on and tie up the ribbon. Start by criss-crossing the two pieces of ribbon around the front of your ankle. Wrap the ribbons around once and tie a bow on the outer side of your ankle. Satin ribbon is slippery, so make sure to wrap tightly and tie a tight bow.  Trim excess ribbon.

Step 5 – Party 

I love this DIY so much, it took me about 5 minutes / 5 dollars and looks so sleek! The great part is that when you are sick of the ribbon just pull it of the shoe and you have a classic heel again.

If you are watching your money this holiday season, this is such a great way to transform what you already own. I am FOR SURE doing this to my red heels as well.

What do you guys think, are you going to try this yourself?

As always, I love hearing from people who have questions about the DIY or have tried it and love it!

xo
See more great articles from Dreamcreate.ca

DIY Paper Flower Wall

Today I have the pleasure of sharing a DIY I spent months making. It’s not a hard DIY, just time-consuming when done to scale. We decided to make the wall after one of our favourite ladies, Nina, created the most beautiful paper roses for my Lancome shoot back in April. I’ve always been obsessed with statement walls, so when given the chance to make one, I jumped!

The wall was a group effort, many evening were spent with scissors, glue, wine, fabulous women, and we began to create our own methods and species of paper flowers as time went on. Below you can find the directions for the three main flowers I created. The rosebud, the waterlily and the dahlia.

Tools needed:

– a ton of paper, colour of choice
– scissors
– hot glue & glue gun (for the wall we used about 80 glue sticks)

The rosebud:

– begin by cutting a paper spiral
– start curling in from the centre, glueing as you go.
– play with width of the spiral and size of the paper for variety

The waterlily & the dahlia & everything else:

– begin by cutting several pointed petals for waterlilies and rounded petals for dahlias.
– curl the first piece and glue
– working in pairs, add dots of glue to the bottom corners of each petal and starting building out the flower
– to build lots of volume glue the petal sides close together, making a more curled, petal like shape.
– I used this method to create roses and all sorts of flowers. It’s very very easy, and each flower will look different depending on the shape you cut the petals.

The wall behind the flowers was half wood / half canvas so I used a combination of hot glue and a staple gun to secure the flowers.

I can’t describe how amazing the flower wall looks. With the morning sun it shines golden, and in the evening the reflection of the exterior brick wall makes the flowers glow pink.

It took many many hours and so many helpful hands, but it was totally worth it. WOuld you guys attempt a flower wall? Let me know if you try!!!

xo Alana

(created at ma-luxe studios with help from the studio collective)

See more great articles from Dreamcreate.ca

DIY Glitter Coffee

It might be a good time to confess, I’m basically a three-year old. I love board games, cartoons and anything that makes me believe in magic. One non-inspiring monday morning I started wondering how to make Mondays more exciting. I had some left over edible glitter and decided to make my own sparkling coffee sweetener, because…..why not!

There are a lot of edible glitter recipes on pinterest, but they are basically coloured sugar, and didn’t have that sparkle that I really wanted. This is how I made my morning disco drink!

tools:

– American Gold edible disco dust (find here or here )
– Powdered sweetener  (I use stevia because it doesn’t kill you slowly…although who knows about the glitter)

1. Mix 1 part sweetener with 2 parts disco dust.

2. Sprinkle immediately over your morning latte or store in a small container and use on days when you just need an extra sparkle!  The glitter has no flavour but stevia is very sweet, so sprinkle with restraint (easier said than done.) If you’re like me and need to drown your drink in glitter, use less stevia in the mixture.

3. Watch out for a glittery milk moustache.

4. If you’re SUPER nerdy, make your own sugar packets out of paper like I did  🙂

Let me know if you try it, and if it made your day extra awesome!

See more great articles from Dreamcreate.ca

DIY Perfume Clutch

 The perfume clutch. An accessory that I initially thought to be too campy became an obsession. Seen above, Nicole Warne from Gary Pepper rocked the Charlotte Olympia clutch and subsequently rocked my world. The clutch retails at $1,200 and the Chanel perfume clutch retails at $9,500….prices I’m NOT willing to pay for an accessory that may or may not stand the test of time. DIY time!

I decided to use the Chanel n.5 bottle as my inspiration, as it’s cult status and clean lines lent to an easy DIY.

Tools needed:

– Acrylic soap dish (I found mine at Winners, but I’ve seen similar clean shapes Home Outfitters or other home decor shops)
– If the soap dish has a lid, SCORE! I took my soap dish into Industrial Plastics and Paint (one of my favourite stores!) and had them cut a piece of acrylic to size. It cost me about $3 and was ready later that day. Look for a local plastics provider in your area.
– Acrylic cube card holder (I found mine at Michaels and simply pulled out the wire)
– Small door hinge
– Magnetic door clasp (my clasp came in a plastic case, which I popped right off to expose the bare metal and magnet. Feel free to leave the plastic on)
– E6000 glue. This stuff is amazing, just make sure to leave it for 24 hours to dry before handling.

This seems like quite a few supplies, but the total cost of the project was around $30, which compared to $1,200 is a HUGE savings!

1. Apply the E600 directly to the hinge, place on the acrylic piece. Do the same for the acrylic cube and the magnetic clasp.

2. Leave these overnight to ensure the glue has dried. It doesn’t dry instantly, but the hold is worth the wait!

3. Place the acrylic piece on top of the dish, make sure everything is lined up, then glue the other face of the hinge to the soap dish and glue the metal clasp to the acrylic piece.

4. Print and cut out your label (I found matte photo paper looks the best.) Spray the back with adhesive and carefully place it on the clutch.

5. Let everything dry for 24 hours.

I can’t wait to use my clutch for fancy events where you only need your phone, some money and a lipstick!

Have fun with the different bottle shapes, different toppers (vintage tea light holders work great), and different labels. I’ve attached the label I used plus a blank template to customize your own label!

Let me know if you like this or if you try it out!

(UPDATE: I found this Acrylic box ready made, all you have to do is add the top and the label!!)

See more great articles from Dreamcreate.ca

DIY Chanel/ Pamela Love Crystal Cuff

Happy Victoria Day long weekend to all my Canadian’s out there!

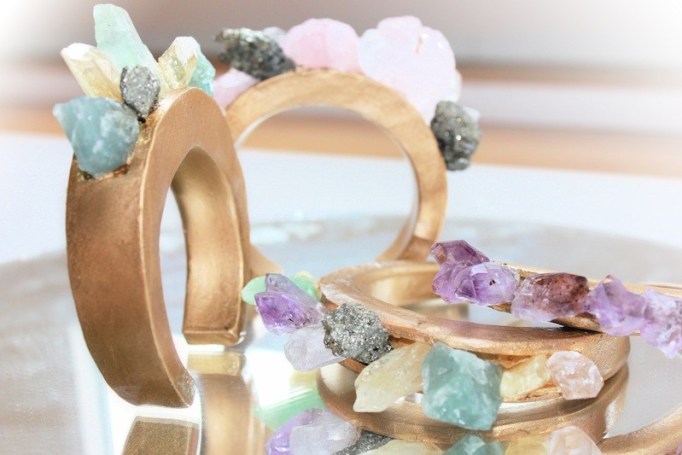
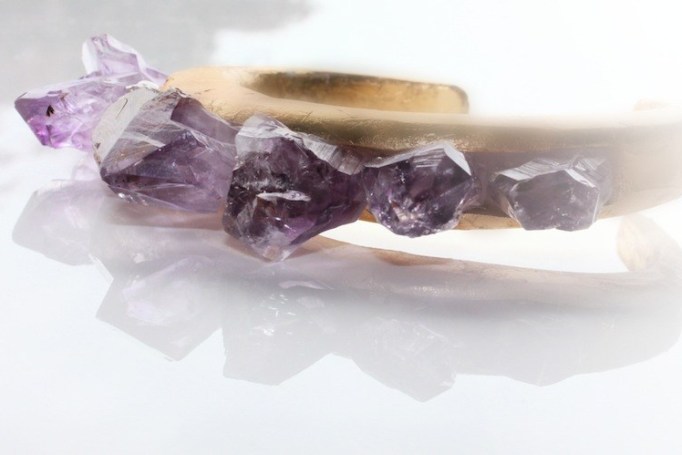
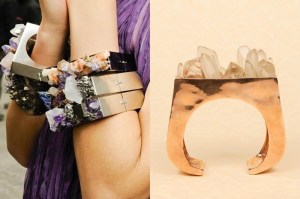
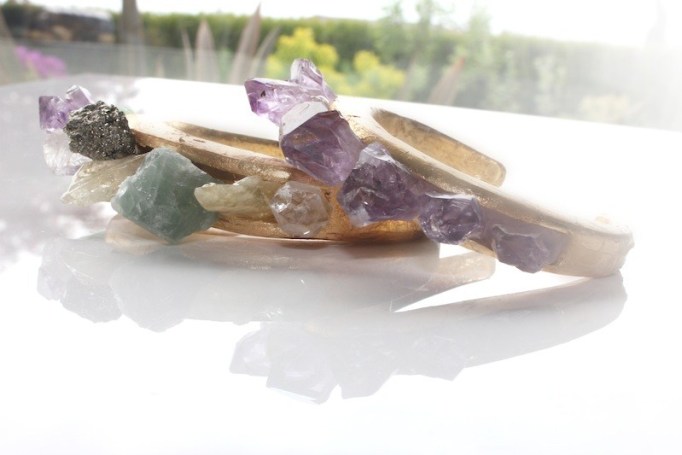
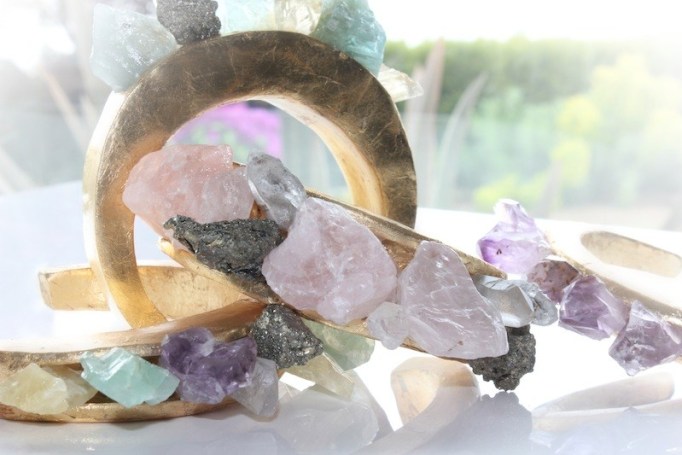
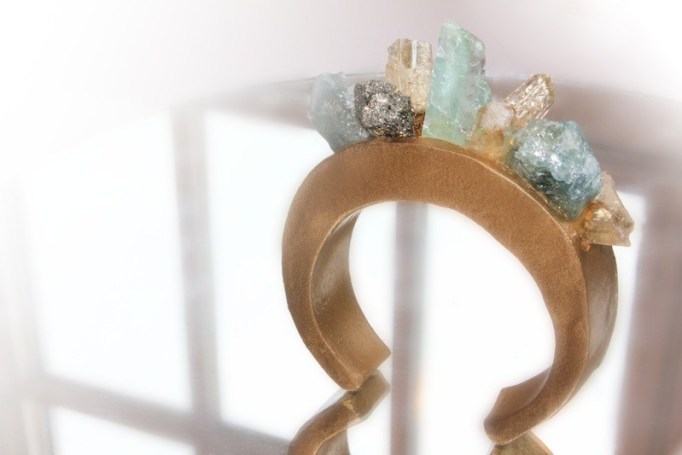
Here at Dream Create I like to celebrate with gifts, first the gift of sharing a DIY, and then an actual gift! Today’s DIY was inspired by the crystal cuffs pictured below, the left from Chanel, and the right from Pamela Love. Apparently both were inspired by a picture from the 70’s, but Chanel decided not to sell their version because of the obvious similarities.  I made mine over 1 day, for under $20 each!

Supplies needed:

Oven hardening clay (I use Fimo or Sculpey)
A utility blade
An existing cuff that fits perfectly
Metallic spray paint & spray sealant
An assortment of small stones (I used a mix of green & yellow calcite, pyrite, amethyst & quartz, found at my local: Rockhound Shop)
Super glue

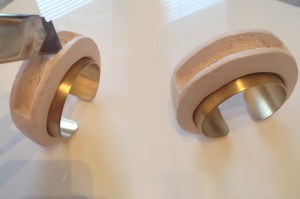
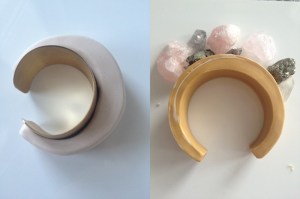
1.Roll out your clay and shape it around an existing cuff to ensure the perfect shape. When you are happy with the size and shape use your utility blade to hollow out a deep section for the crystals.

2.Bake the cuff at 275 farenheit for 15 minutes. Let it cool.

3. Organize the crystals as you like them. I found the more random the better!

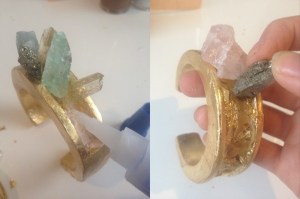
4. Spray paint the cuff with approx two coats, finish with a sealant spray.

5. Use small dots of super glue and begin to attach your crystals. Hold each for 60 seconds before you attach the next, this ensures a firm hold.

That’s it!! These were my first attempt and they worked out amazingly well! I plan on making more, refining the process, making them smoother, playing with colours, it’s really fun!


Now for my second gift…..

I’m going to give two lucky readers one of these hand crafted beauties! 

This is open to anybody in any country! Just make sure to:
1. Follow Dream Create on any of these: WordPress, Facebook, Twitter, Bloglovin or email notification.
2. Leave your name & email in the comments below with your favorite colour combo!
Since I love everybody and could never choose just one, I’ll be using an online tool that chooses at random.

Giveaway ends on May 28th!

Have a great monday everyone!!

Cheers

See more great articles from Dreamcreate.ca

DIY Starfish Cuff

If my dad has taught me anything it’s that any sort of mold is bad! Mold on food, BAD! Mold from a house leak, VERY BAD! Enter silicone mold, GOOD! I saw this picture, and somewhere deep in my soul I knew that I needed a starfish cuff, so I decided to make one myself! I started with Easy mold silicone putty, Fimo, and a dried starfish from a craft store.

Following the instruction on the box, I mixed the silicone and molded it around the original starfish shape. With the perfect resulting mold, I filled it with Fimo and wrapped the Fimo starfish around a small glass. I baked the starfish wrapped glass in the oven for 15 minutes at 275 deg F, let it cool then spray painted it gold!

Use a glass smaller than your arm, as Fimo is a little flexible. You can use any object to make yourself a unique cuff, and you can use all sorts of casting materials like  resin, epoxy, wax, plaster, air dry clay, concrete and low melt metals.

UPDATE: Another way to make this DIY at an even cheaper price point would be to press the original starfish into a block of Fimo, follow the same baking instructions, let cool, then use it as a mold! This would cut the price more by than half! EasyMold is washable, food grade and won’t deteriorate, but for this project you don’t really need those attributes.

I hope everyone is having a great week, (so far) mine is super productive, super busy, and ultimately very rewarding!

Cheers!

See more great articles from Dreamcreate.ca